Beginner Bodyweight Workout Plan for Building Muscle—Full Guide
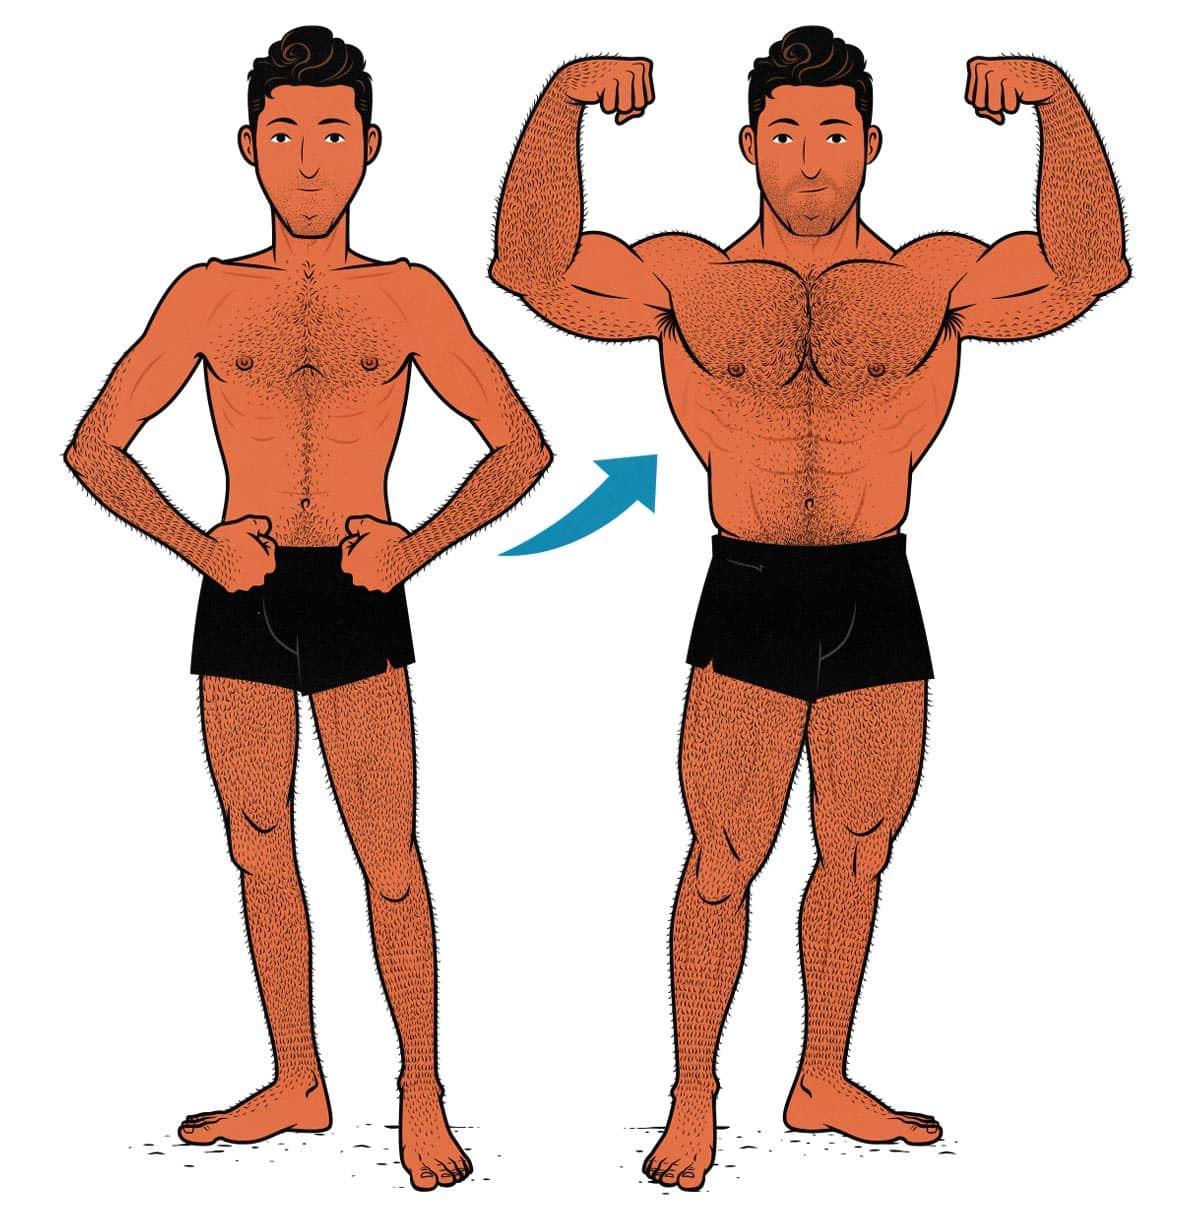
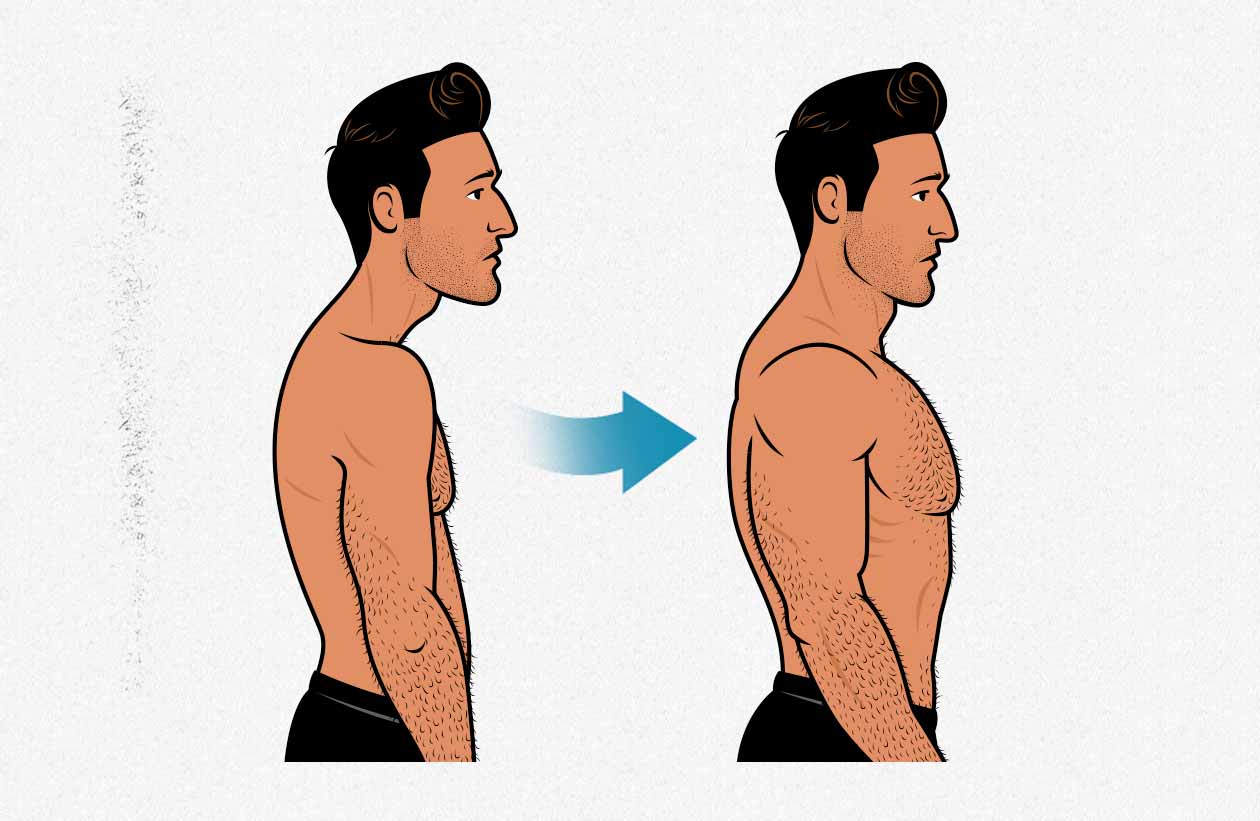
Bodyweight workout plans can be incredibly good for building muscle, especially in your upper body. If you put enough mechanical tension on your muscles, they’ll grow. That’s just as true with bodyweight exercises as it is with free weights or exercise machines.
However, most bodyweight workout plans are designed to help people get fitter, not more muscular. If you’re trying to build muscle, that won’t cut it. To maximize your rate of muscle growth, you need to train for muscle growth. You need to do bodyweight hypertrophy training.
In this article, we’ll teach you the best bodyweight exercises for building muscle, then give you a full hypertrophy training workout routine you can do at home.
- Can Bodyweight Exercises Build Muscle?
- The Principles of Muscle Growth
- Bodyweight Progressive Overload
- The 4 Best Bodyweight Exercises for Building Muscle
- One: Push-Ups
- Two: Chin-Ups (or Inverted Rows)
- Three: Bodyweight Squats
- Four: Bodyweight Deadlifts
- Bodyweight Isolation Exercises
- The Bodyweight Workout Routine
- Should You Ever Get Free Weights?
- Conclusion
Can Bodyweight Exercises Build Muscle?
You can build muscle with bodyweight exercises just as quickly as if you were using weights. Push-ups and chin-ups are two of the best muscle-building lifts of all time. If anything, they’re better than bench presses and rows (study, study).
Bodyweight exercises can be good for gaining strength, too. Not in the powerlifting sense, where strength is measured by your 1-rep squat, bench press, and deadlift, but in the sense where you’ll build a strong and functional body.
The downside is that bodyweight training can be more complicated and painful than lifting weights. When you’ve got a barbell, progressive overload is as simple as adding a few extra pounds to the bar. With bodyweight training, you need to add reps (which hurts) or switch to more difficult exercise variations (which, if you aren’t careful, can change the muscles you’re training).
If you’re willing to grit your teeth and put in the reps, you can do this. You can build a tremendous amount of muscle with bodyweight training. You just have to be a scrapper.
Now is no time to think of what you do not have. Think of what you can do with what there is.
The Old Man and the Sea
The Principles of Muscle Growth
The simplest way to explain muscle growth is with the story of Milo of Croton. Milo was the prototypical skinny guy who dreamt of being muscular, so he had the idea to challenge his muscles by carrying around a calf. He was skinny (and calves can weigh as much as 500 pounds), so that was more than enough to challenge him, provoking muscle growth.
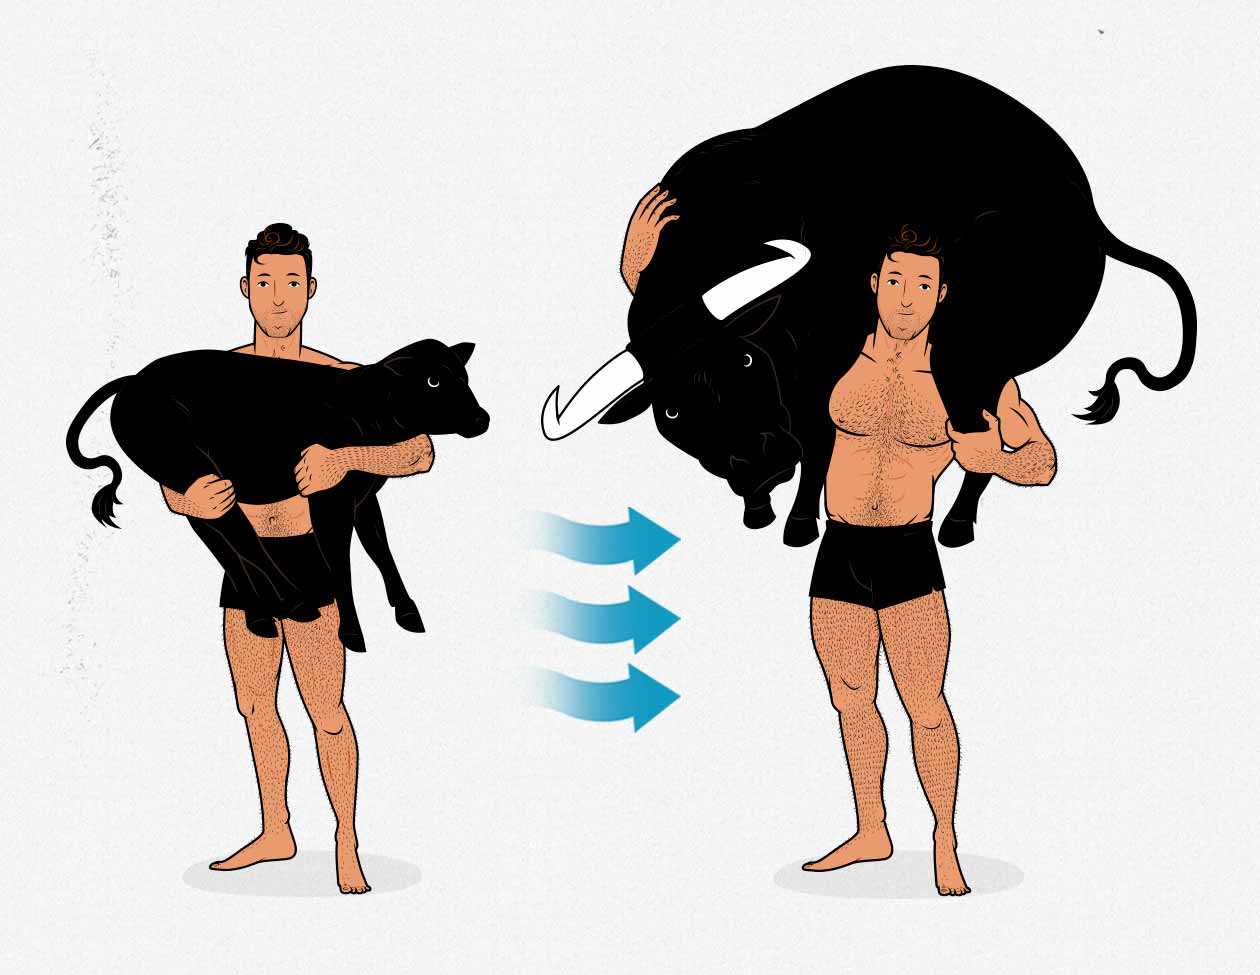
After carrying the calf, he feasted, slept, and grew bigger. Then he went back to carry the calf again. Of course, as Milo grew bigger, so too did the calf, and so his bigger muscles were always challenged by the ever-heavier calf.
Now, I realize you’re probably more interested in bulking up your chest and arms than your calves, but the same principle holds true. We need to challenge our muscles enough to stimulate growth, recover by eating enough calories and getting good sleep, and then challenge our muscles again—doing more than last time. This idea of always doing more is called progressive overload, and it’s at the heart of both strength and hypertrophy training (aka training for muscle size).
- Lift.
- Eat.
- Rest.
- Lift more than last time.
It’s easy to get caught up in the magic of the hypertrophy rep range, the advantages of certain lifts, or the benefits of certain techniques, but the most important thing is to simply challenge our muscles by bringing our sets close enough to failure (or even all the way to failure). If we’re always lifting close to failure and always striving to do more, then our muscles will be forced to grow bigger.
And then, of course, once we’ve stimulated muscle growth, we need to kick back, eat big, and get a good night’s sleep. That’s what allows us to build muscle. That’s how we can show up to our next workout bigger and stronger than last time.
Bodyweight Progressive Overload
The supposed problem with callisthenics is that we can’t progressively increase the amount of weight we’re lifting. That’s not quite right. We’ll be gaining weight, adding more weight to our bodyweight exercises. When I started doing chin-ups, I weighed 130 pounds. Now I weigh 200 pounds. The chin-ups gradually got much heavier.
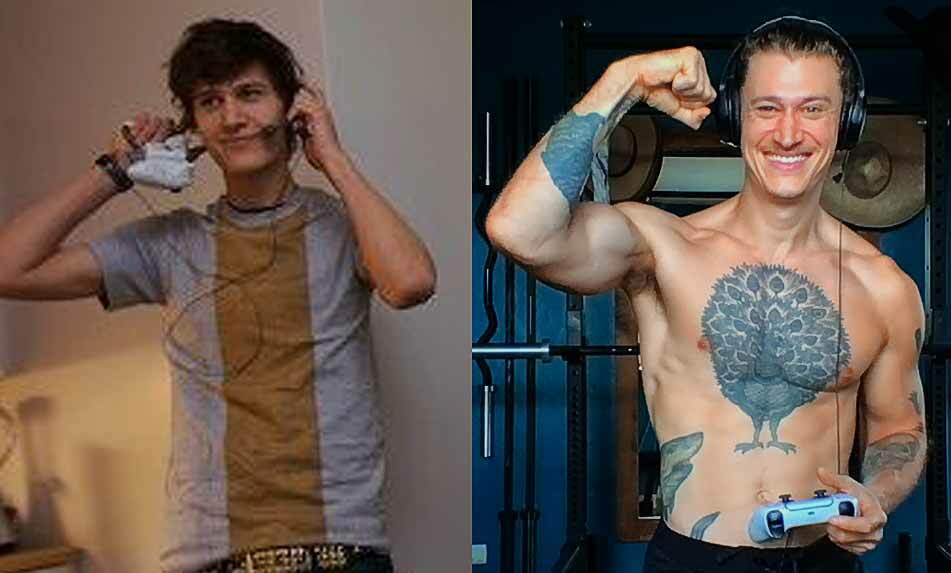
Even so, adding a pound of muscle to our frames allows us to lift a disproportionate amount of weight. At 130 pounds, I could barely do a single chin-up. At 190 pounds, I can do chin-ups with 100 extra pounds around my waist. So although gaining weight helps, it won’t be enough. We need a more robust progression system.
That’s why the main form of progression is adding reps. Every time you repeat a workout, try to get more reps than last time. The catch is that if your reps drift too low or fly too high, your muscles won’t grow as much. So the idea is to keep our reps within the range that stimulates a maximal amount of muscle growth: the “hypertrophy rep range.”
The best evidence we have shows that anywhere from 6–20 reps stimulates a similar amount of muscle growth (systematic review). Some experts speculate that the rep range extends to 4–40 repetitions, though I pity the poor soul suffering through 40-rep sets of push-ups or crunches.
Practically speaking, if you can do at least 4 reps, you can stick with that exercise variation until you hit 20 or perhaps even 40 reps. That gives you progressive overload, the heart of muscle growth.
- Workout One: 4 reps, 4 reps, 3 reps (11 total reps)
- Workout Two: 5 reps, 4 reps, 4 reps (13 total reps)
- Workout Three: 5 reps, 5 reps, 5 reps (15 total reps)
- Workout Thirty: 25 reps, 23 reps, 22 reps (70 total reps)
As you’re fighting to add reps, you can add in other forms of progressive overload, as needed:
- Increase the number of sets. If you’re having trouble adding reps each workout, you can add more sets. So instead of doing 3 sets of push-ups, you’d do 4. This will increase the stimulus, hopefully allowing you to start making progress again.
- Progress to a harder exercise variation. When you can do a few sets of 20–40 repetitions, it’s time to find a more challenging exercise variation. For example, when you can do 20 split squats, raise your back foot up on a bench (Bulgarian split squats). When you can do 20 of those, try pistol squats.
The 4 Best Bodyweight Exercises for Building Muscle
Our muscles can be broken down into muscle groups—muscles that work together to perform a movement. For example, when you do push-ups, your chest, shoulders, triceps, and serratus muscles all work together to help you push the floor away.
We want to choose a bodyweight exercise for every big movement pattern: pushing, pulling, squatting, and hinging. Those four movements will train almost all the muscles in your body, with a few notable exceptions: your calves, spinal erectors, and neck.
- Push-ups: the foundation of bodyweight hypertrophy training. Push-ups work your chest, shoulders, triceps, and abs. Start with easier variations (like raised push-ups) and work towards harder ones (such as deficit push-ups).
- Bodyweight squats: your quads and glutes are the two biggest muscles in your body. The squat trains both of them, making it the best exercise for gaining overall muscle mass. Start with easier variations (like air squats) and work towards more challenging ones (such as pistol squats).
- Chin-ups: the best bodyweight exercise for your back, biceps, and abs. You can start with lowered chin-ups or inverted rows, working towards full chin-ups.
- Bodyweight deadlifts: the hardest movement pattern to train with bodyweight exercises. You could do one-legged Romanian deadlifts or glute-ham raises, but if you want to train your spinal erectors, the towel deadlift is probably best.
These five lifts aren’t a full workout plan. They could be, but they don’t have to be. We prefer to use them as a foundation to build upon. Push-ups are all you need to build a bigger chest, but nothing’s stopping you from adding in dips. Chin-ups are great for your abs, but you could add in crunches and planks.
Just don’t lose sight of your goal. Focus on getting better at these 4 main exercises. If you can do that, you’ll do great. If your progress stalls, is it because you’re too fried or too fresh? We can then raise or lower the volume accordingly.
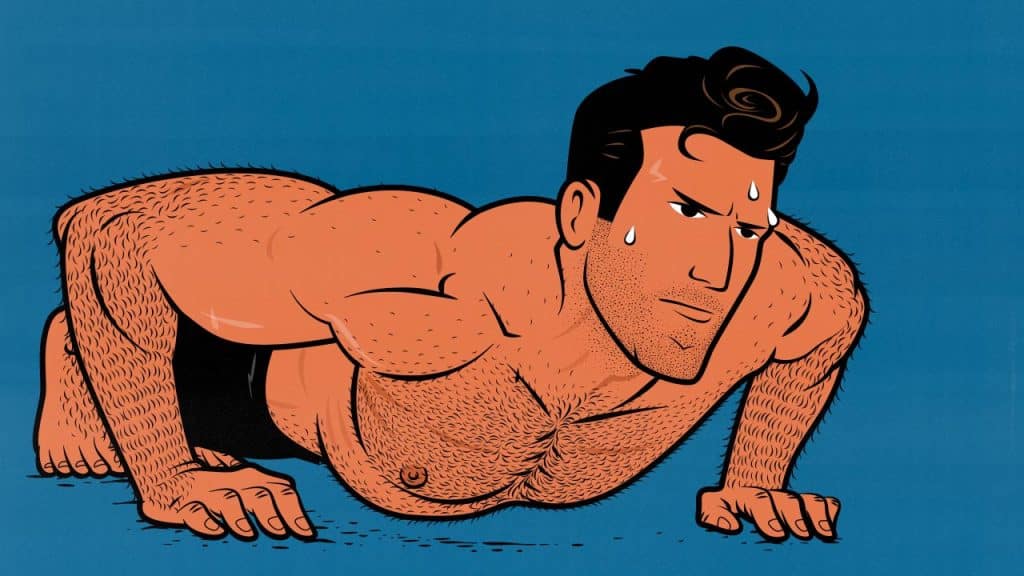
One: Push-Ups
Muscles Worked by the Push-Up
The lift that makes bodyweight training so good for improving our general strength and appearance is the classic push-up. In many ways, it’s comparable to the bench press. Both train the chest, shoulders, and triceps. But the push-up does a bit more than that:
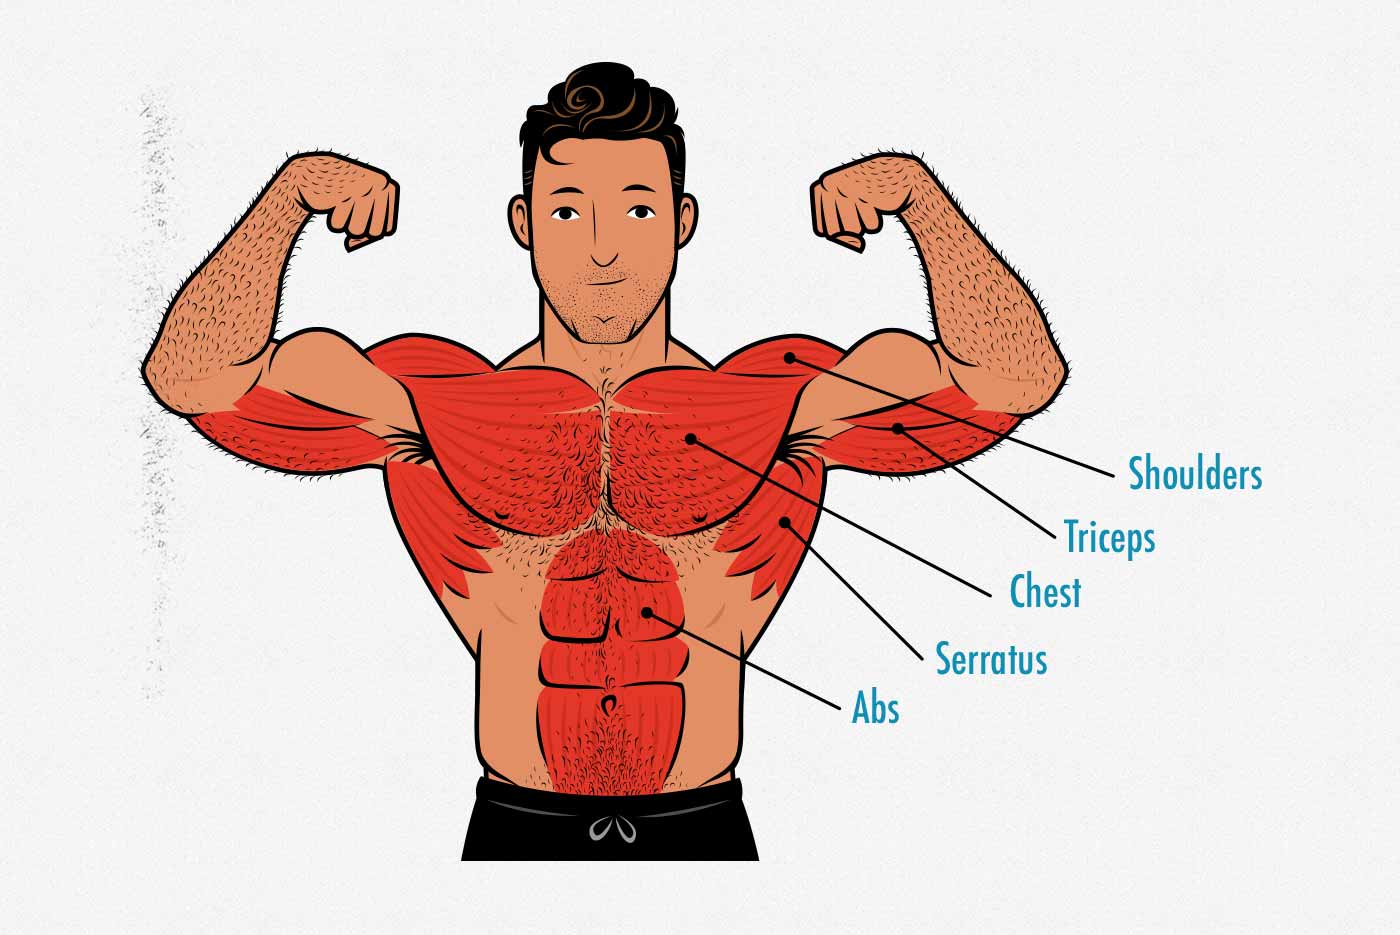
To do a push-up, we need to hold our torsos in a rigid “plank” position, making it a good lift for bulking up our abs. Plus, because our shoulder blades aren’t pinned back, the push-up is also a good lift for bulking up our serratus anterior muscles.
Min-Maxing the Push-Up for Muscle Mass
When doing push-ups for muscle growth, we want to put our hands slightly wider than our shoulders (to ensure good chest activation), with our fingers facing roughly forwards, and with our elbows tucked to around 45 degrees. There’s some flexibility here. You can go a little closer or wider, and angle your hands a few degrees—no problem. But the idea is to mimic the position of a standard-grip bench press, like so:
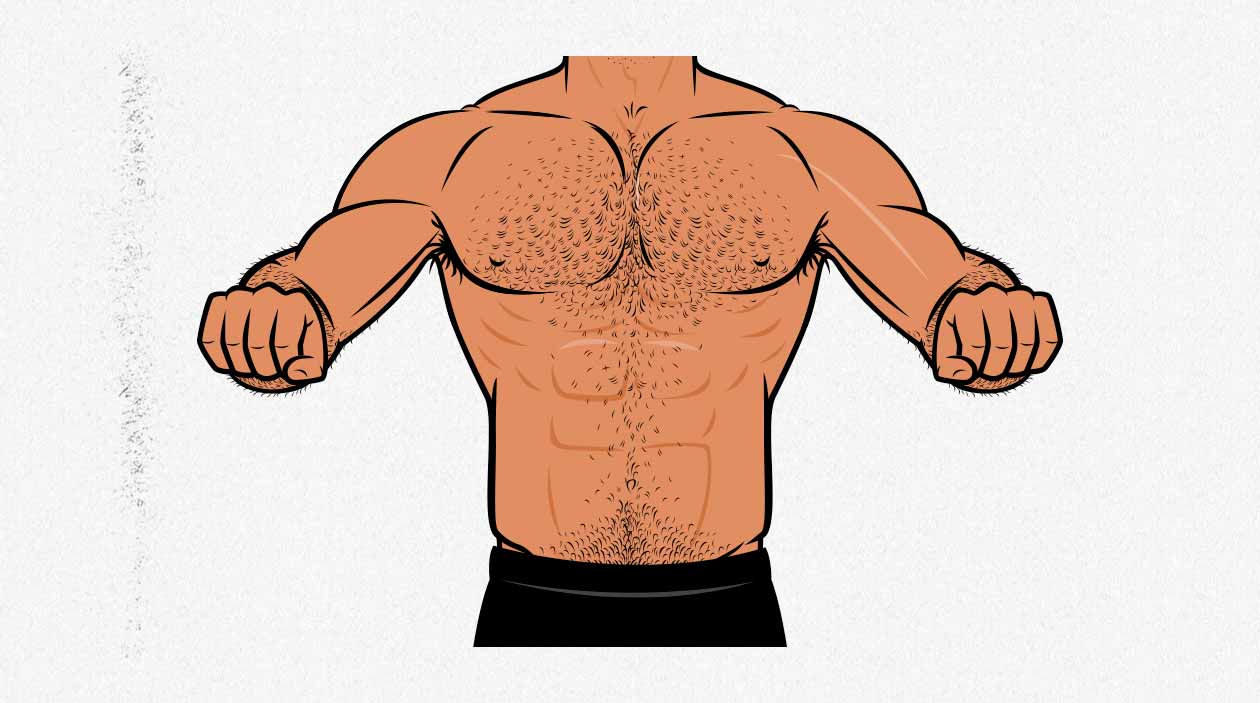
By using this moderate grip, we’re putting fairly equal emphasis on the chest, upper chest, shoulders, and triceps. It’s a great compound lift that works a ton of different muscles at once. If we go much wider, it becomes more of a chest-isolation lift. Much closer, and it becomes more of a triceps isolation lift.
The next thing is to brace your core as if you’re doing a front plank. The idea is to keep your torso rigid and solid throughout the set. Never let your hips sag, even as you approach failure. This makes it much easier to stimulate your upper-body muscles, but it’s also good for stimulating your abs and improving your posture.
Finally, we need to standardize the range of motion. For a push-up rep to count, your chest—not your stomach or nose—needs to touch the floor (or the bench if you’re doing raised push-ups). You can tuck your chin and look down or raise your chin and look ahead—either is fine. Then, when you push back up, lock your arms out (for your triceps) and push your body all the way up, fully contracting your chest and serratus muscles. Unlike the bench press, you don’t keep your shoulder blades tucked. Push the ground as far away as you can.
On that note, it’s not a bad idea to keep constant tension on your muscles throughout the entire range of motion. You don’t need to pause at the top or rest your weight on the floor at the bottom. But we still recommend going through the entire range of motion. The full range of motion standardizes technique, makes the push-up better for building muscle, and, best of all, it makes the push-up harder, reducing the number of reps you’ll be able to do before hitting failure.
How to Progressively Overload the Push-Up
The downside to the push-up is that it’s tiring in higher rep ranges. And because it’s hard to load with progressively heavier weights, it can be hard to escape those higher rep ranges. What most people do is gradually raise their feet (study):
- Knee push-ups: if you do push-ups from your knees instead of your toes, you lift 49% of your body weight.
- Hands-elevated push-ups: if you raise your hands on a tall bench (60cm), you lift 40% of your body weight. With a shorter bench (30cm), you lift 55% of your body weight.
- Push-ups: with your hands and feet on the floor, you lift 65% of your body weight.
- Feet-elevated push-ups: if you raise your feet on a short bench (30cm), you lift 70% of your body weight. If you raise your feet higher (60cm), the load increases to 75% of your body weight.
Thus, the best way to progress your push-ups is to start with your hands raised, progress to the floor, and then raise your feet.
Upgrade: Deficit Push-Ups
Muscles grow best when you challenge them in a deep stretch. It’s a huge benefit, too. Choosing lifts that work your muscles at longer muscle lengths can increase muscle growth by 2–3x. Push-ups already challenge your chest and shoulders at long muscle lengths, but deficit push-ups go even deeper, getting you slightly more growth.

The easiest way to do deficit push-ups is to get parallettes. That’s an affiliate link from my favourite brand, Rogue Fitness. That’s where I get all of my own equipment. Cheaper variations are perfectly fine, though. These parallettes also make it easier to do pike push-ups, L-sits, and a variety of other bodyweight exercises.
Add-On: Vertical Push-Ups
The next variation of push-ups to consider is the vertical push-up. The fronts of our shoulders (front delts) are worked quite hard by regular push-ups, but pike push-ups will do a better job of working your side delts and traps, giving you broader shoulders and a more formidable upper body.
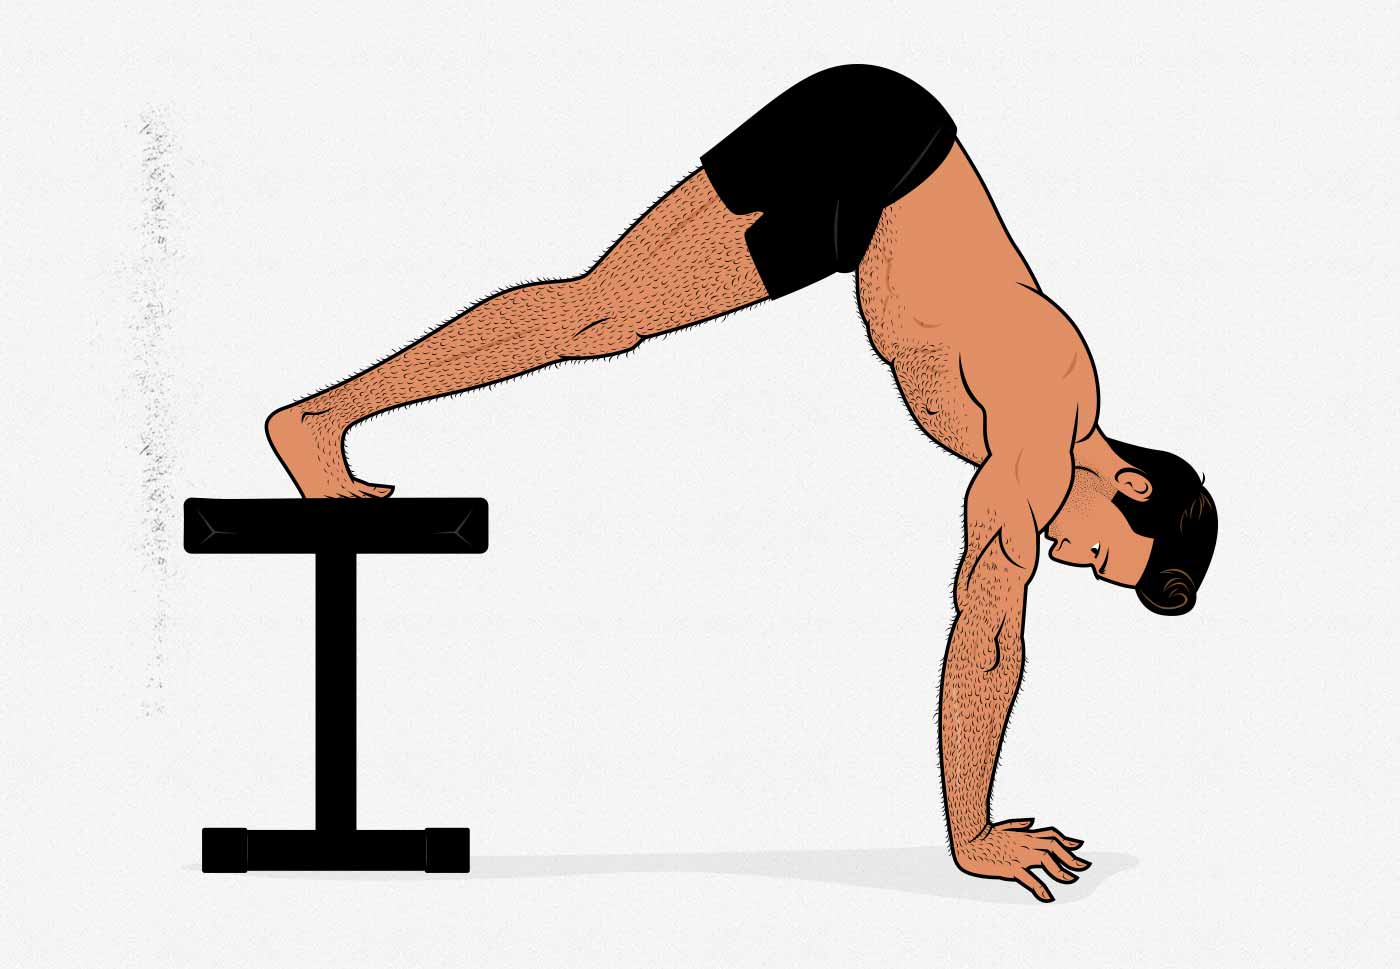
The most common vertical push-up is the “pike” push-up, done with your feet on the ground and your glutes raised high. That’s a good place to start. Then, when you’re ready, you can raise your feet up.
I like to do these in addition to my regular push-ups. You could do that by alternating between the two variations or by doing one after the other.
Two: Chin-Ups (or Inverted Rows)
Chin-ups work almost all of your pulling muscles through a huge range of motion. They’re the best exercise for bulking up your upper back, bar none. Or, perhaps I should say bar one. To do chin-ups, you need a chin-up bar or gymnastics rings. If you get gymnastic rings, you can use them to do inverted rows and dips, too. I highly recommend them. I use mine several times per week.
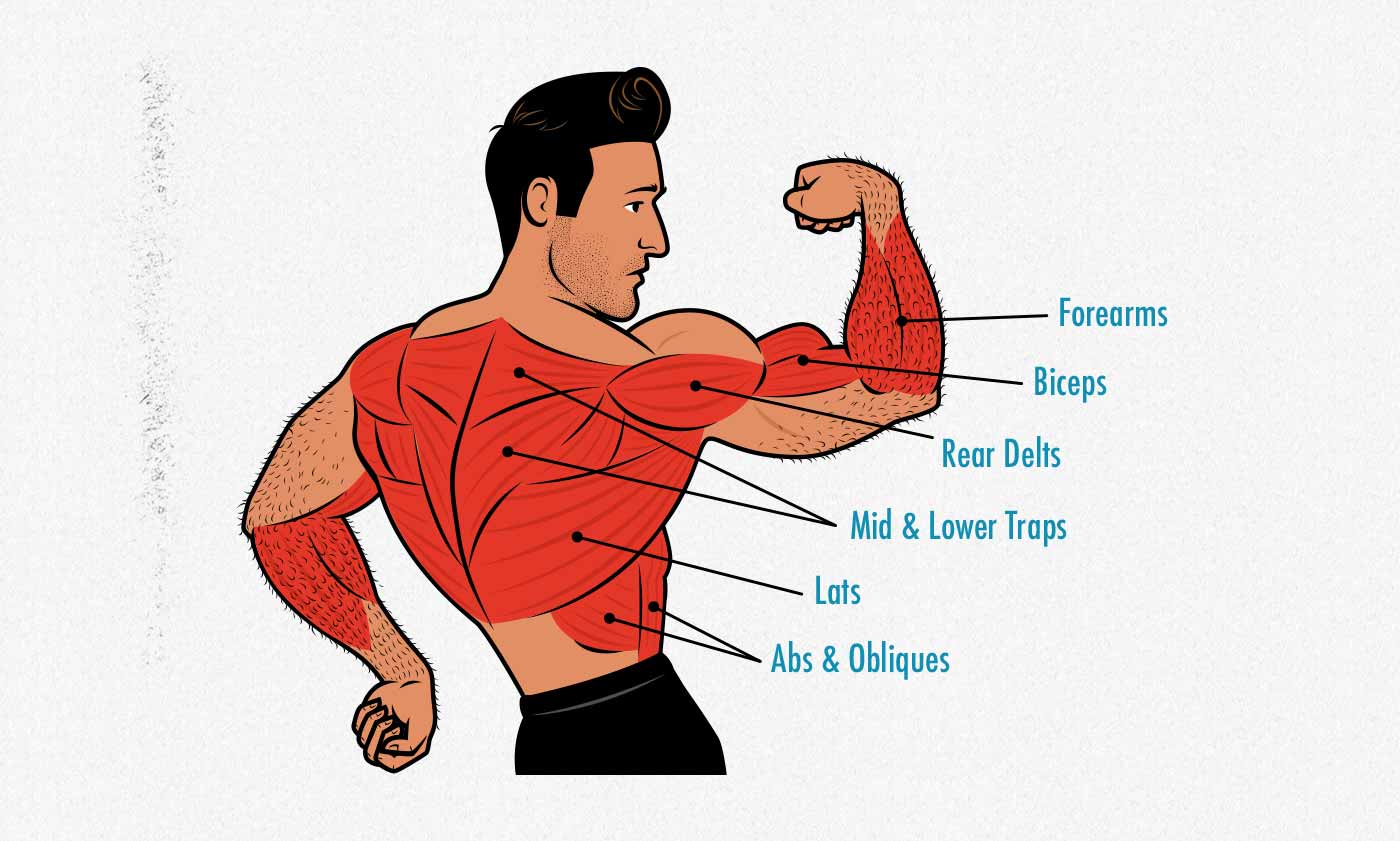
Muscles Worked by the Chin-Up
Chin-ups work most of the muscles in your upper back, with the notable exceptions of your upper traps and spinal erectors. Chin-ups are also great for bulking up your biceps, forearms, and abs. They’re especially challenging for your abs if you lift your knees up. Even more so if you do with your legs raised out straight in front of you (L-sit chin-ups).
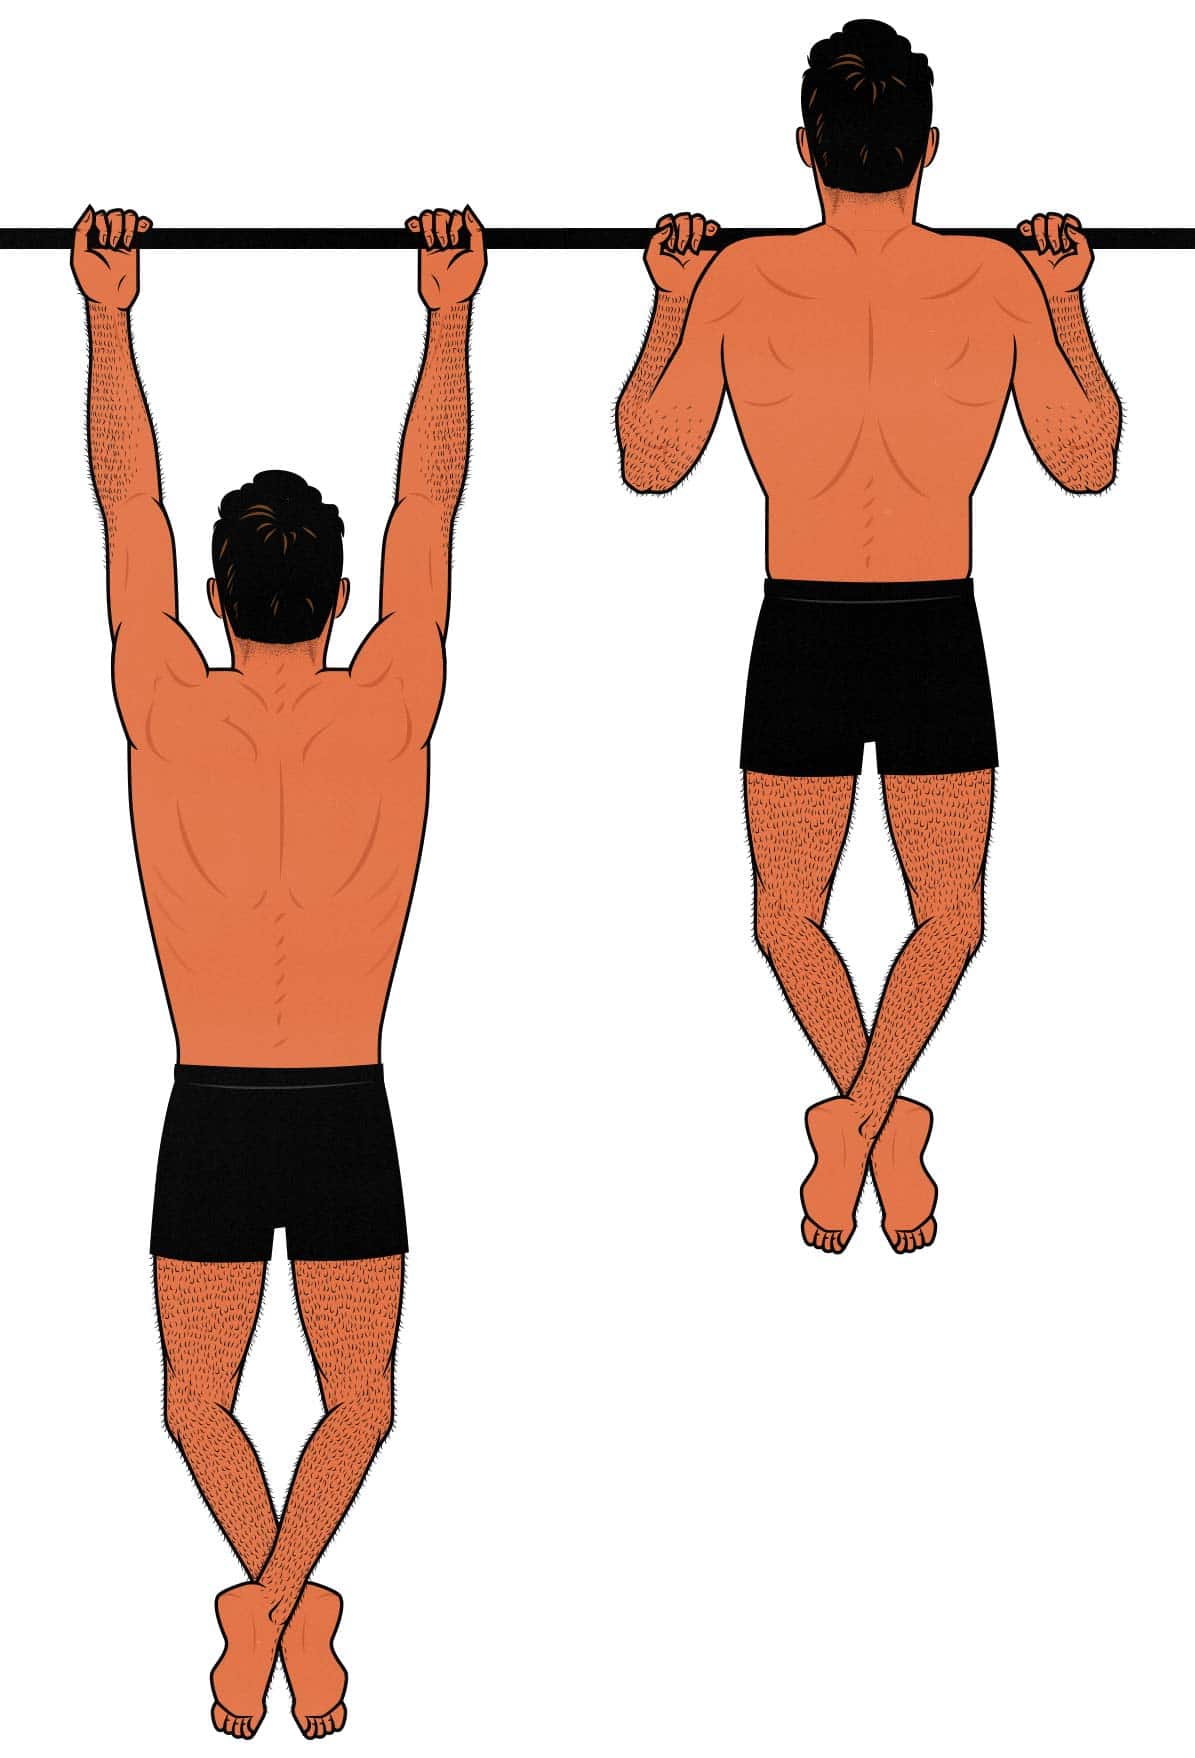
Progressing the Bodyweight Chin-Up
Most men aren’t able to do a single chin-up, let alone ten, let alone forty. As a beginner, you might not be able to do them yet.
- If you’re using a pull-up bar, you can put a stool underneath, allowing you to start in the top position. Another good beginner variation is the assisted chin-up. You’d attach a resistance band to the bar and stand or kneel on it, with one or both legs. I’m not a huge fan of resistance bands for building muscle, though. Bodyweight, dumbbell, and barbell exercises are better. So I recommend using a stool instead.
- If you’re using gymnastic rings, learning how to do chin-ups is even easier. Just lower the rings closer to the ground, starting with inverted rows. As you get stronger, raise the rings higher, giving your body a more vertical angle. Soon you’ll be doing full chin-ups.
What we recommend is using chin-ups as your main bulking lift, but then if you want to add in some extra lat work or exercise variation, add in some pull-ups. Your biceps will thank you.
That gives us a chin-up progression system that looks like this:
- Lowered or supported chin-ups until you’re strong enough to do at least a few reps.
- Regular chin-ups. You can also do variations like pull-ups to emphasize your lower lats and knee-raised chin-ups to emphasize your abs.
Three: Bodyweight Squats
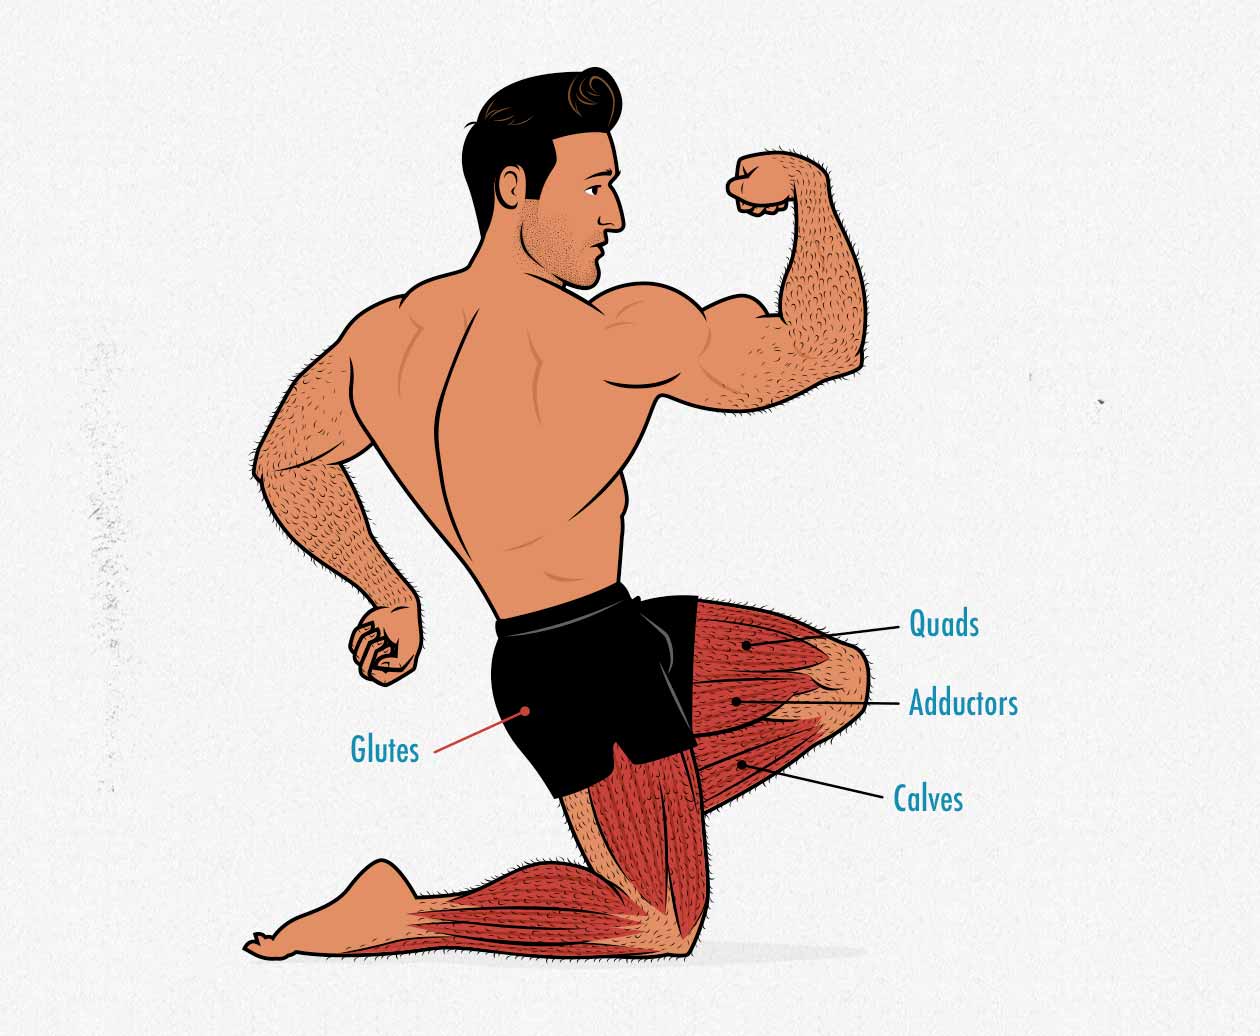
Muscles Worked by Bodyweight Squats
The sheer amount of muscle being worked by squats is wild. Your quads alone are 7x as big as your chest. Your glutes are 5x as big as your chest. Even your calves are nearly 3x bigger than your chest. This makes squats several times bigger than push-ups and chin-ups combined.
On the bright side, bodyweight squats are incredibly good for building muscle. However, they’re also fearsomely tiring and brutally painful. If you aren’t careful, they can easily test your grit instead of your strength.
Progressing Bodyweight Squats
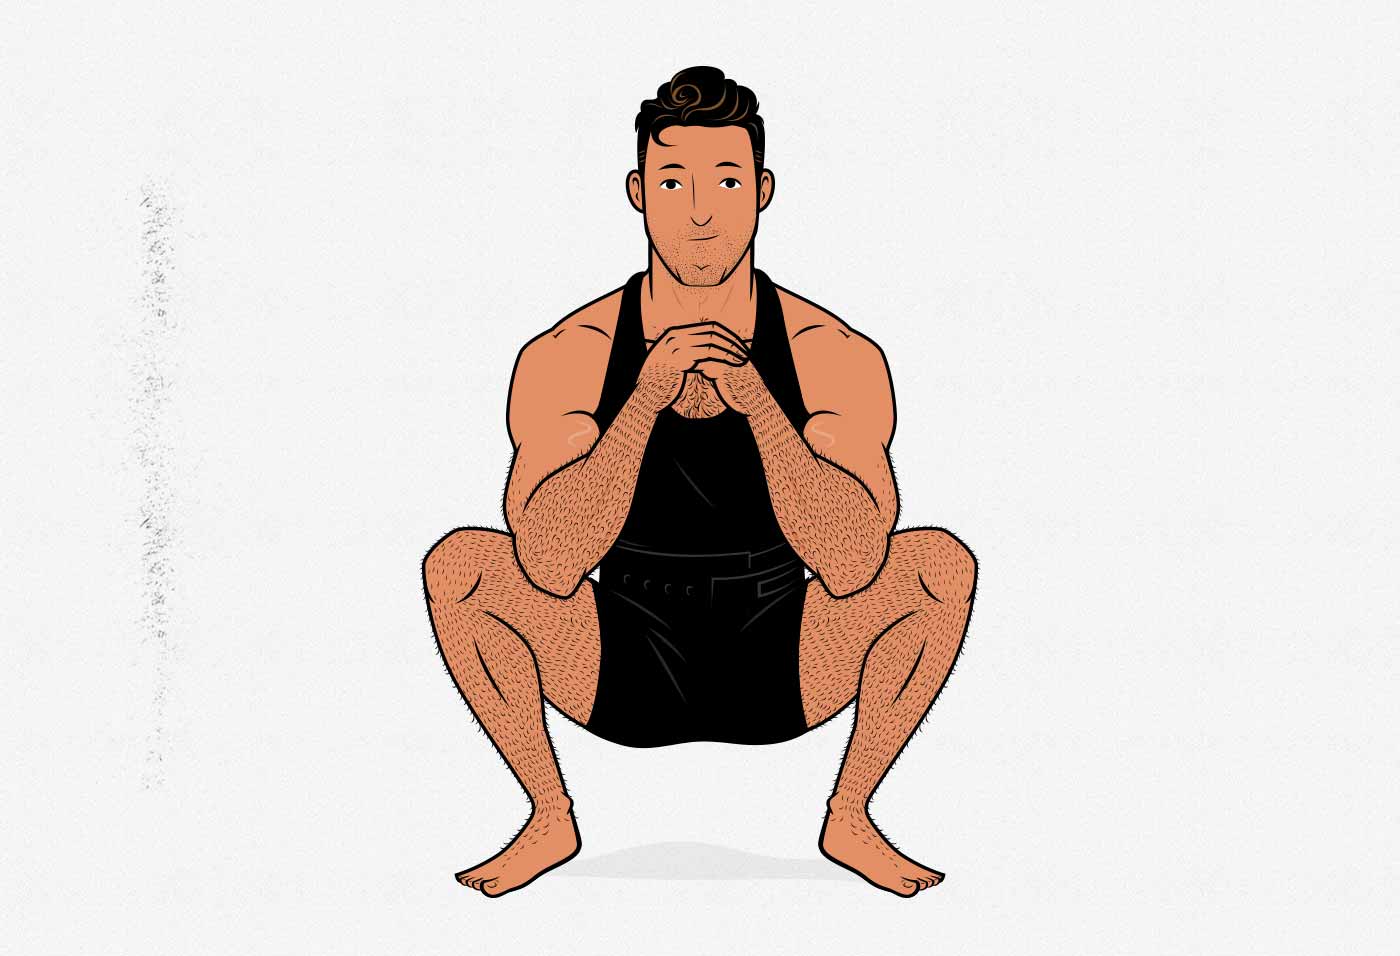
The first and easiest bodyweight squat progression is the air squat. Hold your hands in front of your body, try to keep your torso as upright as possible, and sit down (not back). You can keep your hands close (as pictured below) or hold them out in front like a zombie. If you have a shorter torso, the zombie approach tends to work better.
The problem with air squats is that they quickly become too easy. Even as a beginner, you may already be able to do 20+ reps before hitting failure. And as the rep range climbs higher, squats become extremely metabolically taxing. We need to make them harder.
One way to progress the air squat is to load up a bag with books and hold it in front of you. If you can read quickly enough, you could add a new speculative fiction novel to the backpack every week, making it gradually heavier. But even if you have a big backpack and like to read heavy books, you’ll quickly grow too strong for them.
When air squats become too easy, you can make them harder by jumping—jump squats. Your muscles will need to work harder to launch you into the air. Then, when you land, your muscles need to decelerate you. This is nice because you need to generate the force at the bottom of the range of motion when your quads and glutes are stretched. That’s great for stimulating muscle growth.
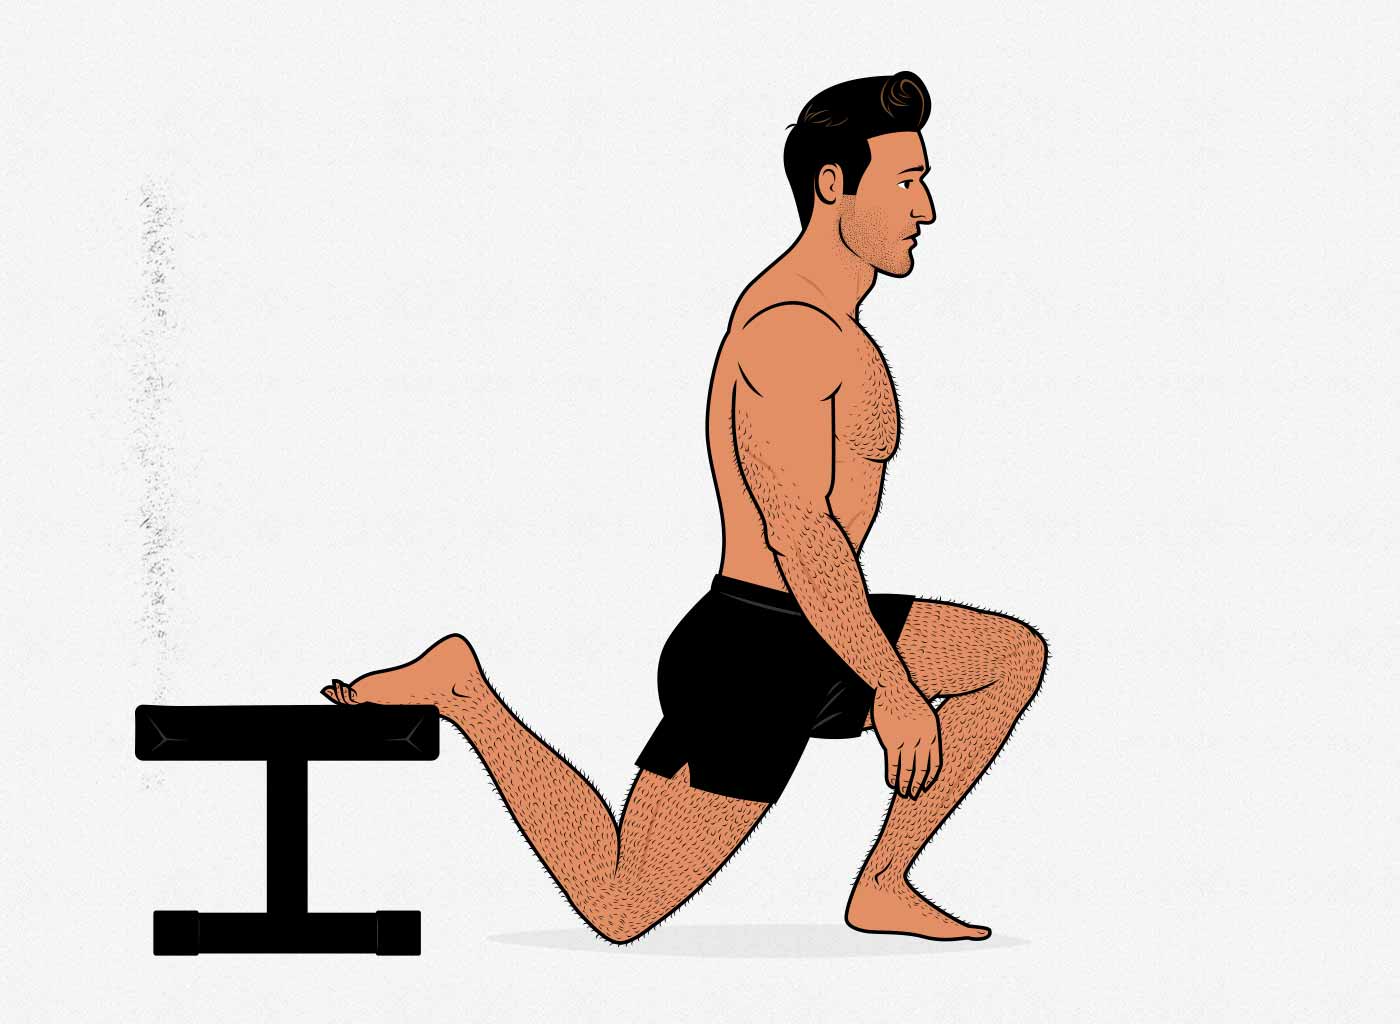
When you grow too strong to train both legs at once, you can switch to doing split squats. Split squats are great because they don’t just drop the range lower; they also cut the muscle mass you’re working in half, making the lift much easier on your cardiovascular system. You can make those split squats more difficult by raising your back leg up—the Bulgarian split squat.
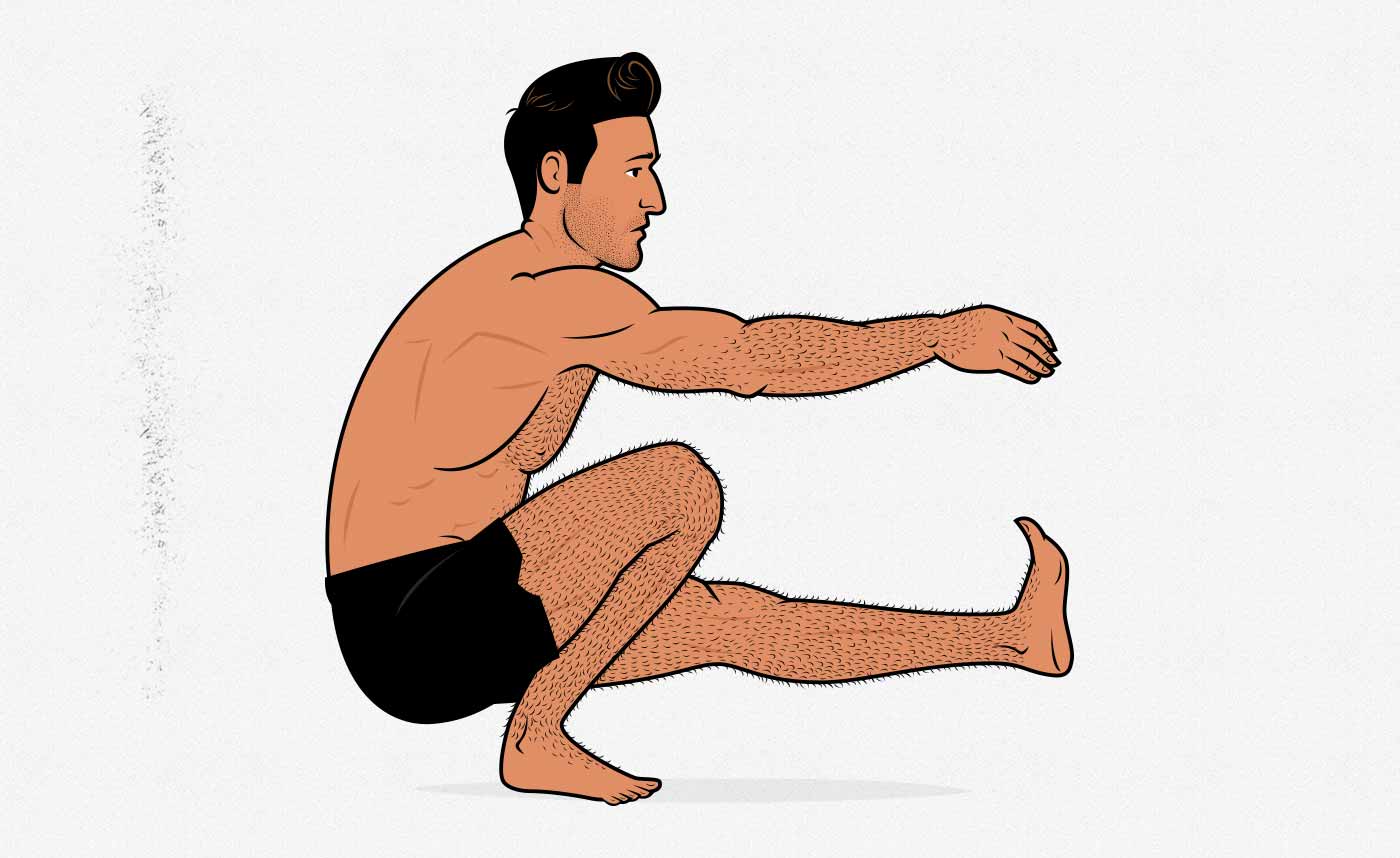
The pistol squat (or rifle squat if you’re on the taller side) puts all your weight onto one leg. If you can do 40 air squats, you may only be able to do a few pistol squats. If you’re having trouble balancing, don’t be afraid to hold onto something for support. The point is to work your quads, not to win a balance competition.
That gives us a bodyweight squat progression that looks like this:
- Air squats until you can do 20 reps. You can get some extra mileage out of these by loading up a bag with books and holding it in front of you. You can also do jump squats, trying to jump as high as possible with every rep.
- Bodyweight split squats until you can do 20 reps with each leg. As with air squats, you can hold a heavy bag in front of you to make them harder. You can also raise your back leg on a bench.
- Pistol squats. Hold something for balance if you need to.
Four: Bodyweight Deadlifts
The Mighty Towel Deadlift
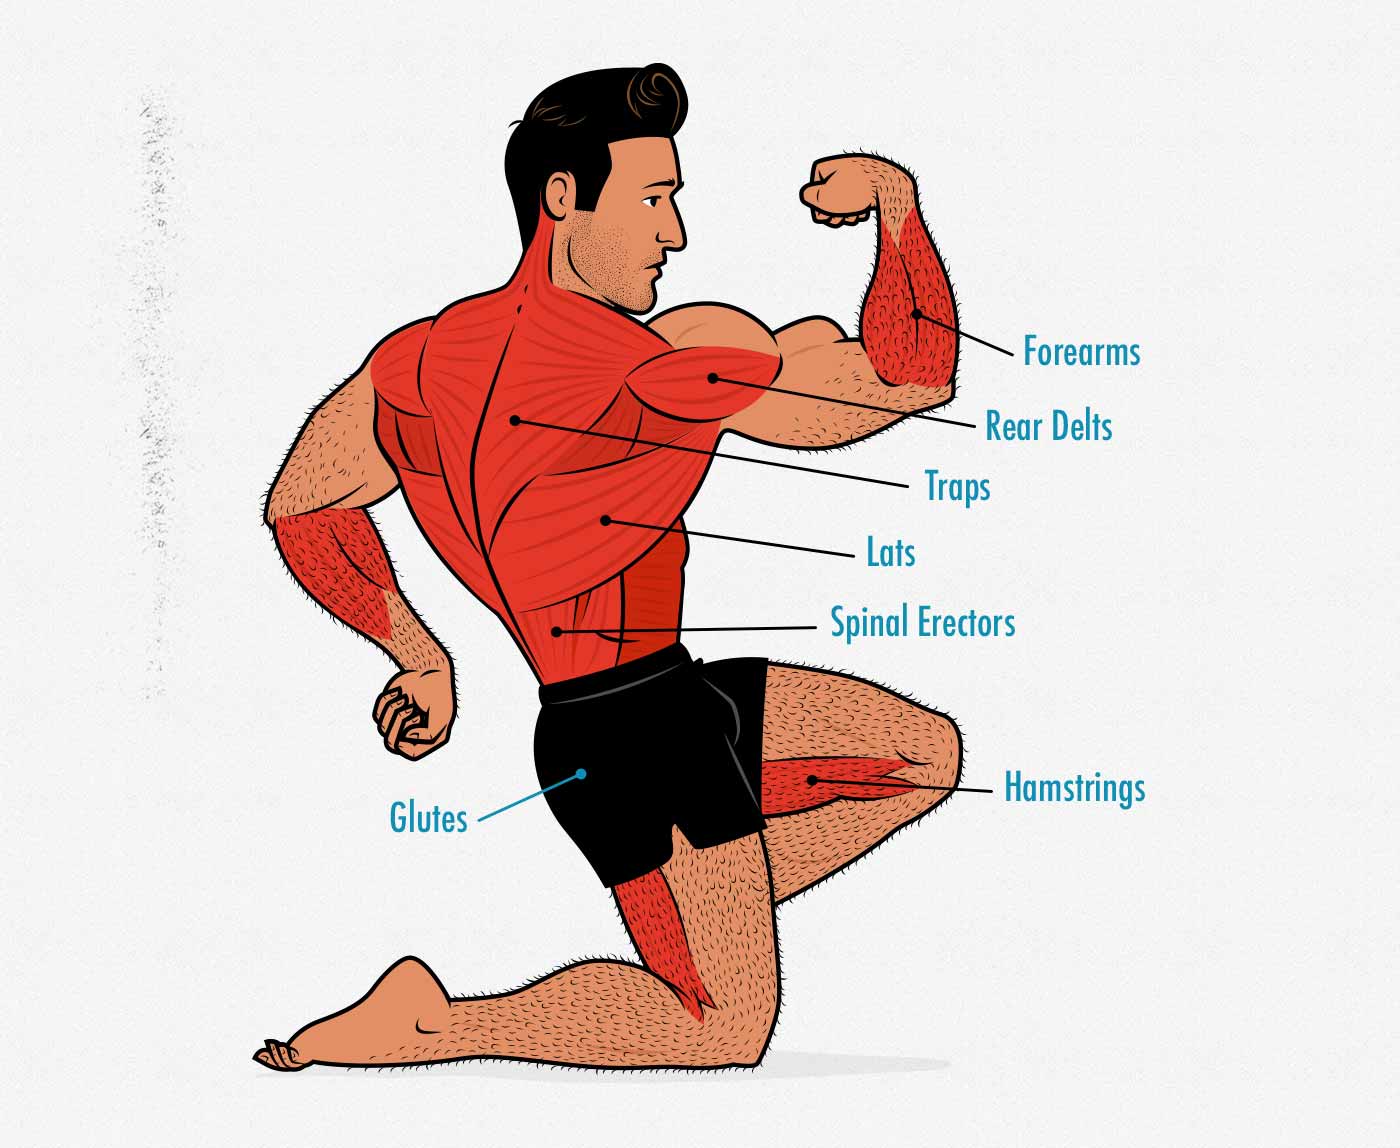
Finding good bodyweight alternatives to the deadlift is tricky because the whole point of the deadlift is to put a heavy load on your spine, traps, and spinal erectors. There are plenty of bodyweight deadlift variations that work your hips to some degree or another, but hardly any of them work the muscles in your posterior chain (such as your spinal erectors).
That’s why my favourite bodyweight deadlift variation is the towel deadlift. You stand on a towel and pull on it, just like you’d pull on a barbell. The difference is that this is an isometric lift—no range of motion. No matter how hard you pull on the towel, it will not move. You’re locked in the bottom position.
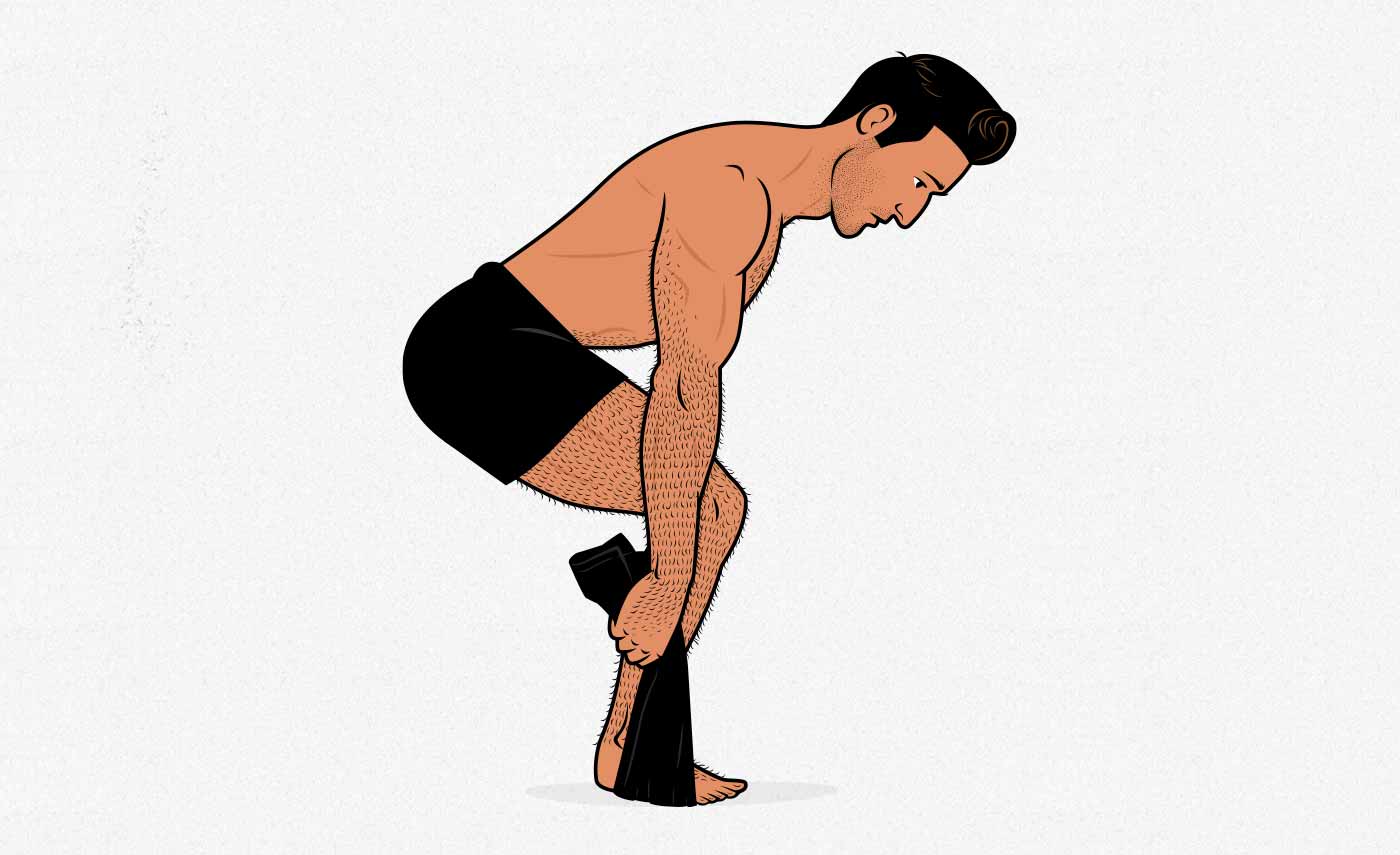
Isometrics that challenge your muscles in a stretched position are good for building muscle. The towel deadlift is done with a deep hip angle, challenging your glutes and hamstrings in a stretched position.
Muscles Worked by Towel Deadlifts
The other great thing about the towel deadlift is that it trains your entire posterior chain. As you pull on the towel, your spinal erectors and mid-back muscles need to work just as hard as if you were pulling on a too-heavy barbell. And because you need to grip the towel, your forearm muscles get worked, too.
Progressing Towel Deadlifts
The nice thing about pulling against a stationary object is that the bigger and stronger you get, the harder you can pull. If you give each set your all, progressive overload is built right into the lift.
When doing towel deadlifts, we recommend using burst reps. Pull as hard as you can for a few seconds, then release the tension. That’s your first rep. Then pull as hard as you can for another few seconds. That’s your second rep. You can progress how many seconds you pull for, and you can adjust how many reps you do per set. For example:
- Week One: 3 sets of 3 reps (3×3), with each rep lasting 5 seconds.
- Week Two: 4 sets of 3 reps (4×3), with each rep lasting 6 seconds.
- Week Three: 4 sets of 4 reps (4×4), with each rep lasting 7 seconds.
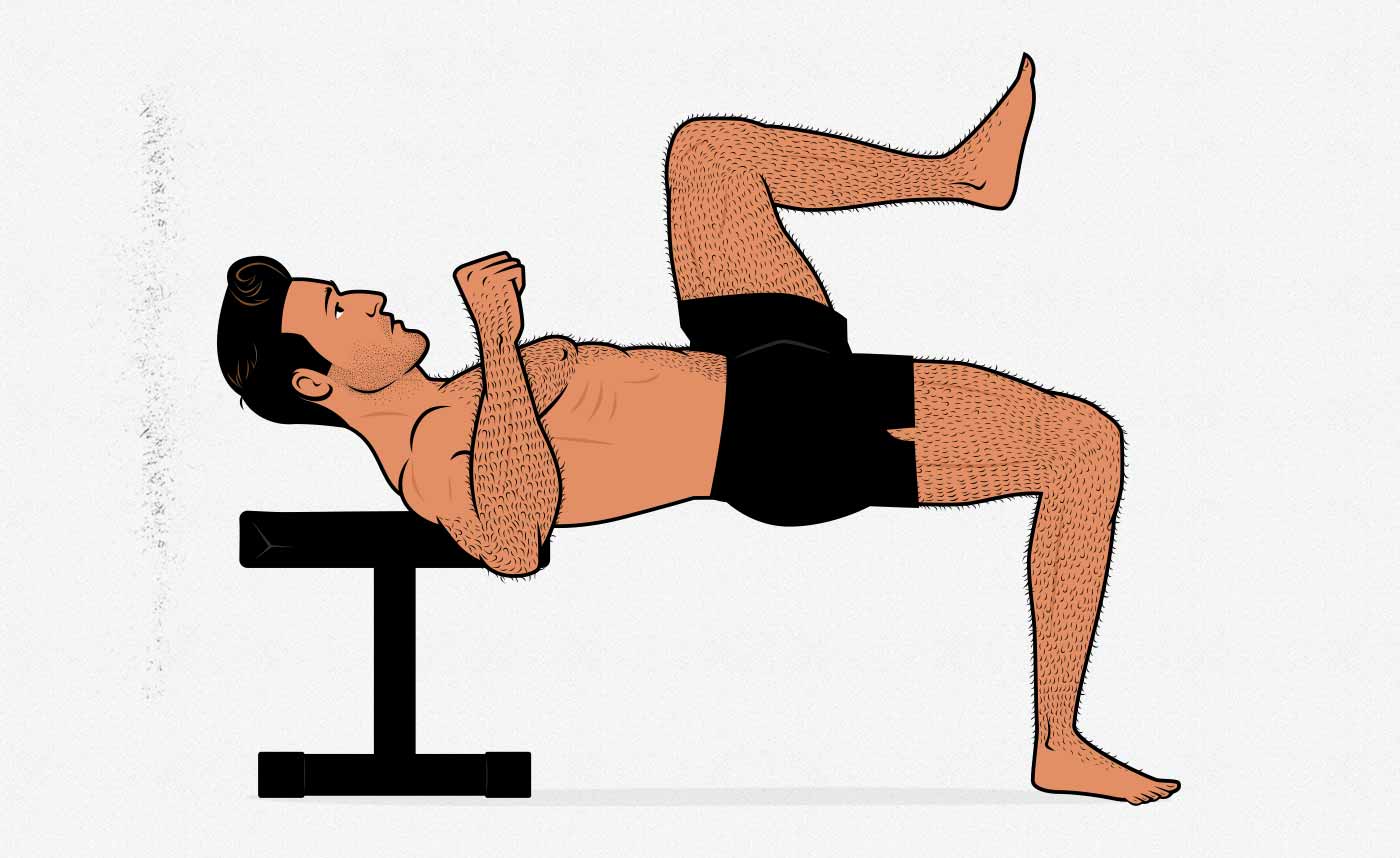
Add-On: Hip Thrusts
The problem with the towel deadlift is that the range of motion is zero. And as a general rule, we want to gain strength through a large range of motion. That’s a crucial aspect of being generally strong, and it’s also the best way to build muscle. It doesn’t matter much with our spinal erectors since their purpose is to hold our backs rigid, but it does matter with our hips, which are designed to move. So, in addition to doing deadlift isometrics, we recommend including some other hip hinges, such as the hip thrust.
For the hip thrust, there are a few progressions:
- Glute Bridge: start with regular glute bridges until you can do at least twenty reps, but feel free to stick with it until you can get as many as forty.
- One-Legged Glute Bridge: once you can do 20–40 reps with both legs on the ground, switch to single-leg variations and work your way back up to 20–40 reps.
- Hip Thrust: when you can do 20–40 reps of one-legged glute bridges, switch to doing hip thrusts with your back on a bench. Feel free to put a backpack loaded with books in your lap to make the lift harder.
- One-Legged Hip Thrust: When you can do 20–40 reps, switch to using a single leg at a time, and work your way back up to forty reps.
Bodyweight Isolation Exercises
After you’ve done a couple of the main movements, you can move to the smaller movements. With the main movements, we recommend training pretty seriously. With the accessory and isolation lifts, you can approach it much more casually. Pick a few exercises that interest you for the muscle groups you’re most eager to grow and try to improve at them a little bit every workout.
There are a ton of different accessory and isolation lifts that you can add to your bodyweight muscle-building routine. Here are some of our favourites.
Abs & Obliques
- Hanging leg raises
- Planks and side planks
- Sit-ups and crunches
- Offset push-ups
- Dead bugs (I love these as a warm-up drill)
Biceps, Triceps & Shoulders
- Dips using parallel bars or rings (chest, triceps, upper back)
- Close-grip chin-ups (biceps & rear delts)
- Bench dips (triceps)
Chest & Back
- Wide-grip push-ups
- Pull-ups
- Muscle-ups (advanced)
Legs & Glutes
- Single-legged Romanian deadlift
- Hip thrusts (and single-leg hip thrusts)
- Glute bridges (and single-leg glute bridges)
- Straight-leg bridges
- Sissy squats
The Bodyweight Workout Routine
Okay, so we’ve gone over the 4 best beginner bodyweight exercises, and we’ve talked about how to progress them:
- The push-up: Start with raised push-ups and work towards deficit push-ups.
- The squat: Start with air squats and work towards pistol squats.
- The chin-up: Start with lowered chin-ups (or table rows) and work towards full chin-ups, perhaps even emphasizing one arm at a time.
- The deadlift: Start with towel deadlifts, doing them longer and harder each workout. Consider adding bodyweight hip thrusts for hip development.
That gives you the foundation of your program, and if you’re a beginner, that may be all you need. You could simply do those 4 exercises three times per week. You can do that with 3 full-body workouts per week or split it up into more workouts. For example, if you wanted 6 short workouts, you could do the lower-body lifts one day, and the upper-body lifts the next.
3-Day Full-Body Bodyweight Workout Routine
- Monday: big 4.
- Tuesday: rest.
- Wednesday: big 4.
- Thursday: rest.
- Friday: big 4.
- Saturday: rest
- Sunday: rest
6-Day Upper/Lower Bodyweight Workout Split
- Monday: push-ups, vertical push-ups, and chin-ups.
- Tuesday: squats, towel deadlifts, and hip thrusts.
- Wednesday: push-ups, vertical push-ups, and chin-ups.
- Thursday: squats, towel deadlifts, and hip thrusts.
- Friday: push-ups, vertical push-ups, and chin-ups.
- Saturday: squats, towel deadlifts, and hip thrusts.
- Sunday: rest.
I would start with a low volume and work your way up. Something like this:
- Week One: two sets of each lift to ease into the routine (and prevent crippling muscle soreness).
- Week Two: three sets of each lift to step up the training volume.
- Week Three: 3–4 sets of each lift, doing more sets for your favourite lifts.
From there, you can increase training volume as needed or desired. If you’re failing to make progress on your lifts, consider doing more total sets. Or, if you’re struggling with crippling soreness or fatigue, consider doing fewer sets. Everyone responds best to slightly different training volumes.
As you gain more experience, feel free to experiment:
- Add in assistance and accessory lifts.
- Experiment with short rest times, circuits, and drop sets.
- Raise the volume higher for the lifts you’re most eager to get better at.
And, of course, this is just a loose recommendation. Feel free to customize your routine as you see fit. As you get deeper into bodyweight training, you’ll be able to see which muscles are getting stimulated during your workouts, which muscles get sore afterwards, which lifts you get better at, and which muscles see the most growth.
Should You Ever Get Free Weights?
Bodyweight training can be a bit finicky, and as you get stronger, the pain of doing compound lifts in higher rep ranges can make it downright brutal. Thus, at some point, most people decide to invest in some free weights.
- Here’s our guide for how to build a barbell home.
- Here’s our guide for how to build a dumbbell home gym.
Conclusion
Bodyweight training can be painful, but if you don’t have access to free weights, you can absolutely bulk with just your body weight. Also, keep in mind that some bodyweight lifts, such as the push-up and chin-up, easily rival the big free-weight lifts, making bodyweight training great for building a big chest and upper back.
We recommend splitting up your bodyweight training into 4 foundational movements:
- Push-ups train your chest, shoulders, triceps and abs. You can start with raised push-ups and work towards deficit push-ups.
- Bodyweight squats train your quads and glutes. You can start with air squats and work towards jump squats and pistol squats.
- Chin-ups train your upper back, biceps, and abs. You can start with lowered chin-ups (or inverted rows) and work towards full chin-ups.
- Bodyweight deadlifts train your spinal erectors, upper traps, hips, and grip. You can combine heavy towel deadlifts with hip thrusts to develop your posterior chain and hips.
There are a few ways you can progressively overload bodyweight exercises:
- Add reps: the heart of bodyweight training is gradually adding reps from workout to workout. If you do 50 push-ups in one workout, your goal for the next workout is to get at least 51. This works incredibly well for stimulating muscle growth.
- Choose more difficult variations: as you get better at the bodyweight lifts, you can gradually progress to more difficult variations. However, this doesn’t happen from workout to workout, it happens from month to month. This progression is too fast. We need something more gradual.
- Gain weight: as you bulk up, you’ll be gradually gaining weight, which will make your bodyweight training heavier over time. This helps quite a bit, but the progression is too slow. Your growing strength will outpace your growing body.
- Add sets: as you grow stronger and fitter, you’ll be able to tolerate more sets per workout. In your first week, two sets per exercise are plenty. In your second week, three sets per exercise are better. And from there, you can progress to four, five, or even more sets per exercise per workout.
Our muscles grow best when we train them 2–4 times per week, so as a good default, we recommend doing each of the movements three times per week. You can do that with three full-body workouts per week, or you can split them up over more days. For example, you could just as easily do a six-day routine, doing the upper-body lifts one day and the lower-body lifts the next.
Feel free to customize the workouts as you see fit, including adding isolation and accessory exercises, adjusting your training volume, and adjusting your training frequency.
If you want more muscle-building information, we have a free bulking newsletter for skinny guys. If you want a full bulking program, including a 5-month workout routine, diet guide, recipe book, and online coaching, check out our Bony to Beastly Bulking Program. Or, if you want an intermediate bulking routine, check out our Outlift Intermediate Bulking Program.
Shane Duquette is the founder of Outlift, Bony to Beastly, and Bony to Bombshell, each with millions of readers. He's a Certified Conditioning Coach (CCC), has gained 70 pounds, and has over a decade of experience helping more than 15,000 people build muscle. He also has a degree in fine arts, but those are inversely correlated with muscle growth.

Marco Walker-Ng is the founder and strength coach of Outlift, Bony to Beastly, and Bony to Bombshell. He's a certified trainer (PTS) and nutrition coach (PN) with a Bachelor's degree in Health Sciences (BHSc) from the University of Ottawa. He has over 15 years of experience helping people gain muscle and strength, with clients including college, professional, and Olympic athletes.
